Tags are a flexible way to classify your meetings and companies. Apply your own tags, then filter your meetings and companies views by tag to find exactly what you need.
Who can do what: Admins and managers create, edit, and delete tags. Any user can apply existing tags to meetings and companies they have access to.
Go to Setup → Tags. Here you can see all tags in your account, how many meetings and companies use each one, and create new tags.
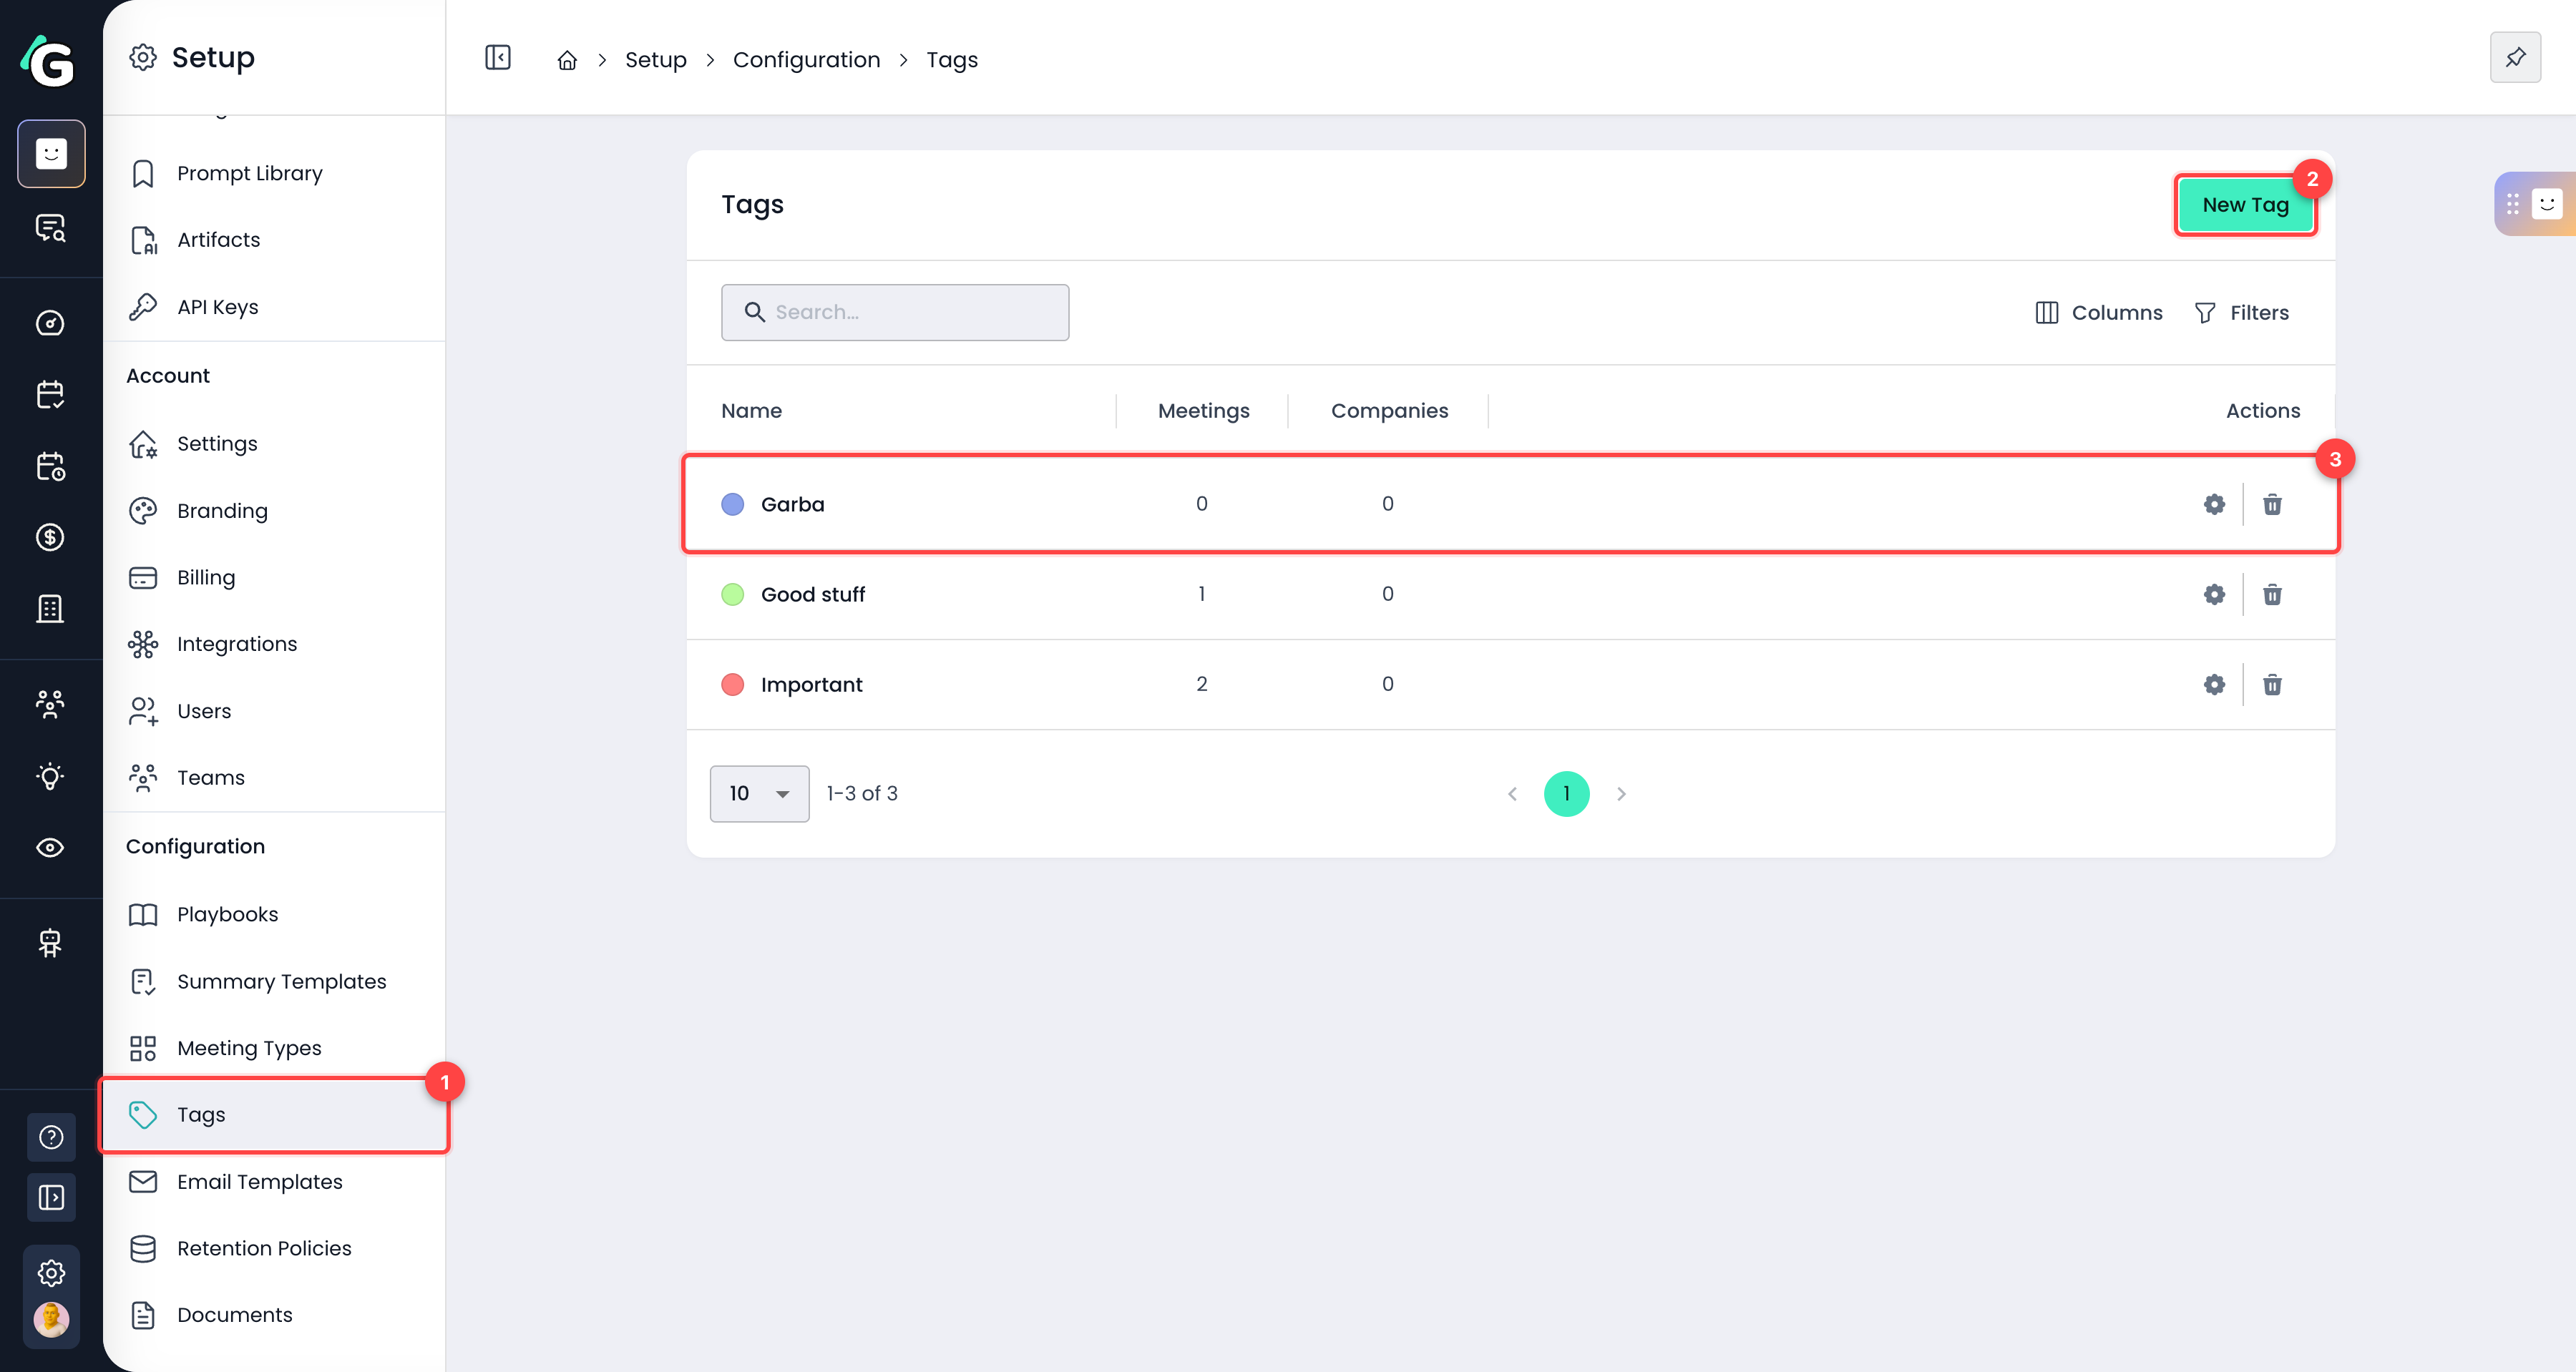
Tags menu item — Found in the sidebar under Setup → Configuration. Visible to admins and managers.
New Tag — Click to open the create-tag dialog.
Tag row — Each row shows the tag's color dot, name, and usage counts. Click a row (or the gear icon) to edit a tag, or use the trash icon to delete it.
Give the tag a short, descriptive name and optionally pick a color.
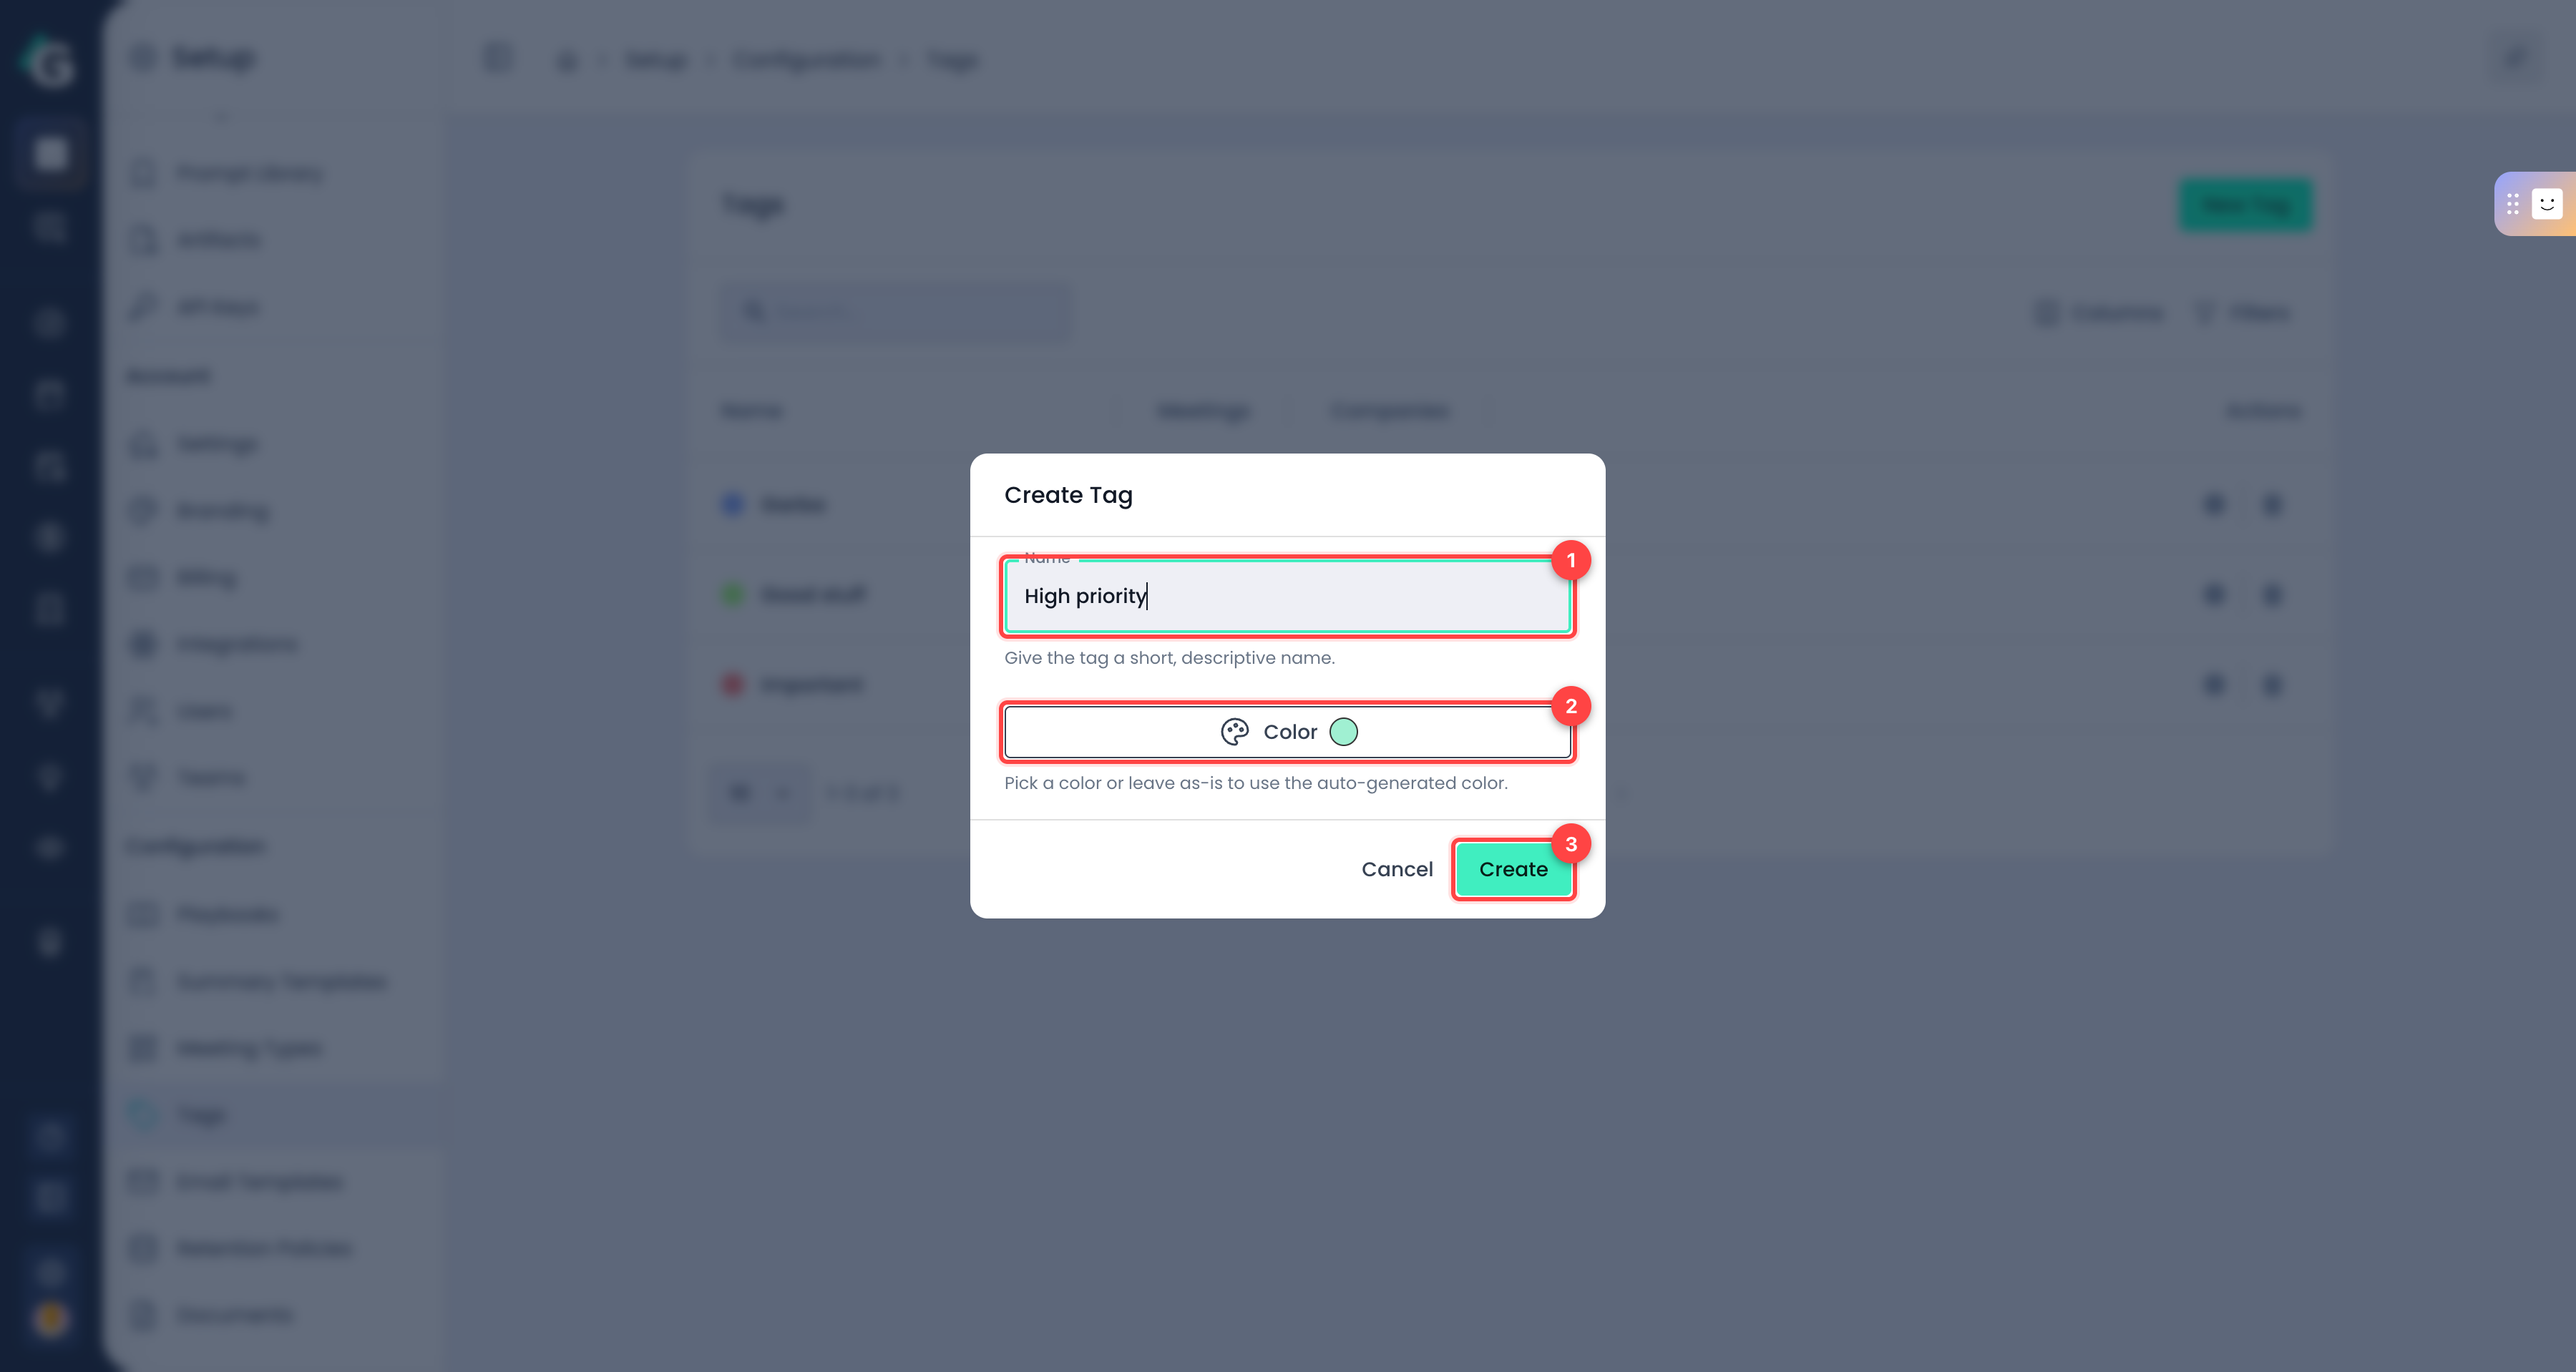
Name — Up to 100 characters. Tag names must be unique within your account.
Color — Click to pick a custom color, or leave it as-is to use the auto-generated color (consistent for the same name, so similar names won't accidentally collide).
Create — Save the tag. It's now available to apply to meetings and companies.
Editing a tag (rename or recolor) updates it everywhere it's been applied. Deleting a tag removes it from all meetings and companies — there's no archive, so use it carefully.
Tags appear as colored chips throughout the app. In the Past Meetings and Companies tables, the Tags column lets you see and update tags inline.

Tags column — Shows the tags applied to each meeting (or company on the Companies page).
Tagged item — Click the + icon next to existing tags to add or remove tags.
Add tag — On rows with no tags yet, click Add tag to open the tag picker.
Tags filter — In the filter panel, select one or more tags to narrow the list to items that have any of those tags. Tag filters can be saved as part of your filter presets.
You can also manage tags from inside an open meeting (via Edit Meeting) and from a company's detail page header.
The tag picker is the same dropdown wherever you apply tags. Type to search, click to add or remove tags, then click anywhere outside the picker to close it.
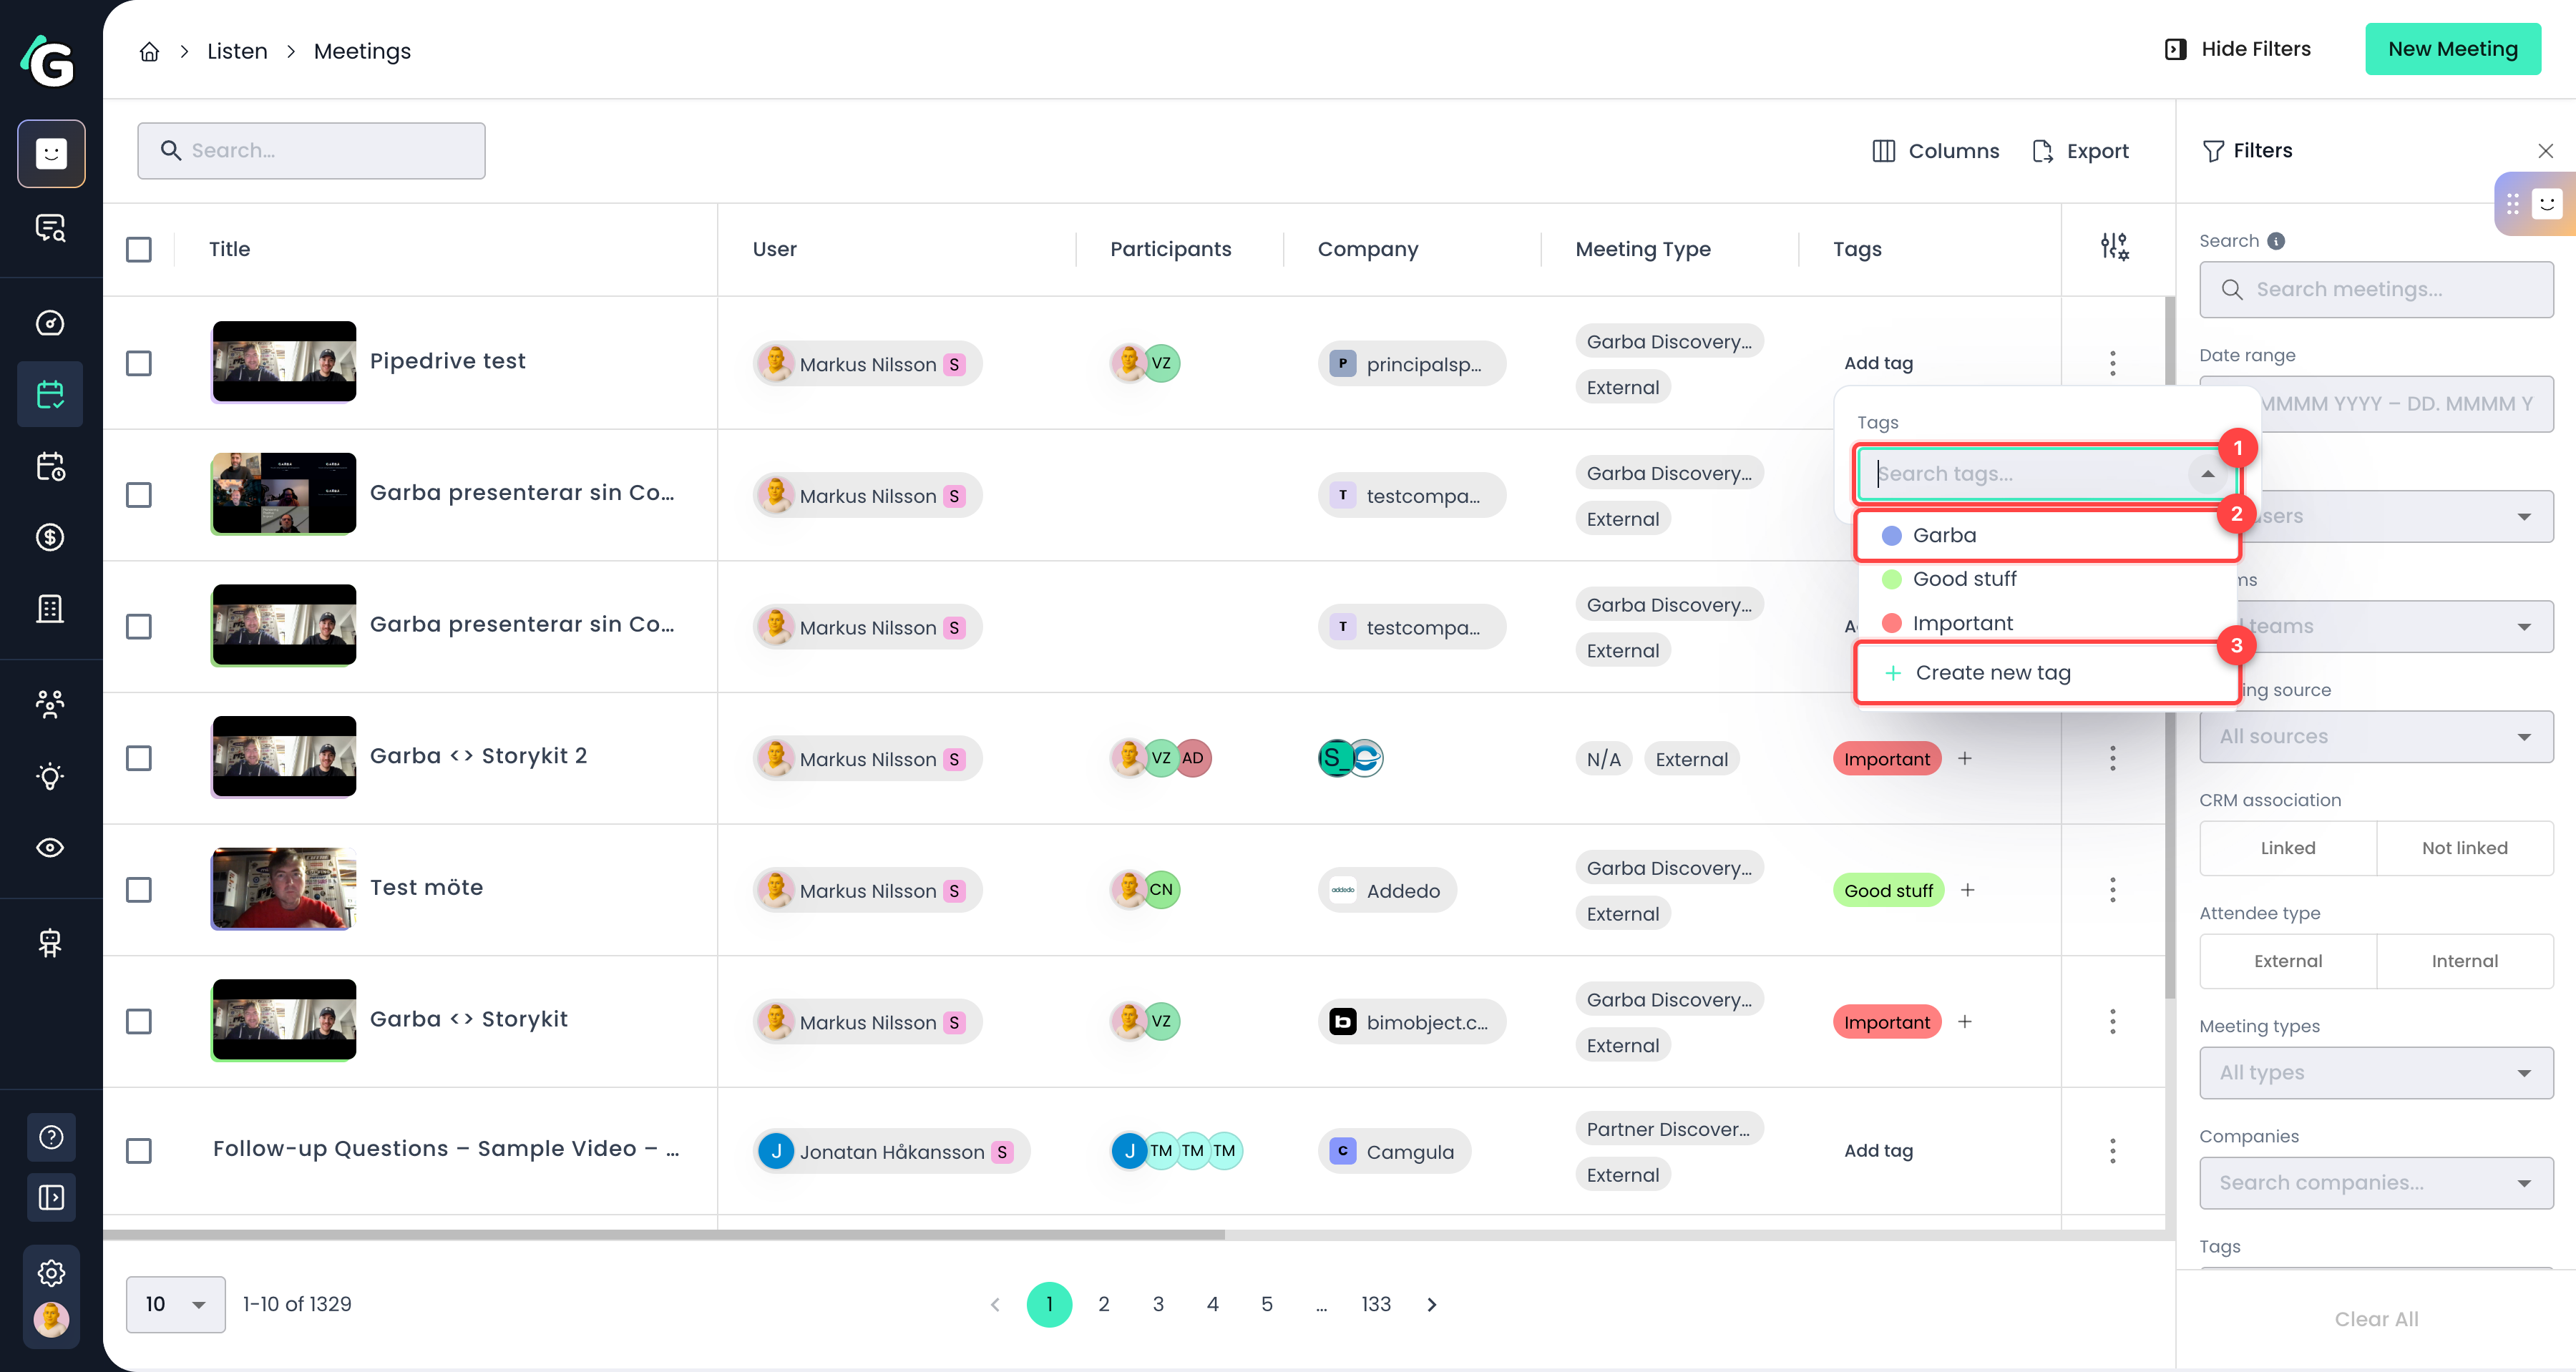
Search — Start typing to filter the list of tags.
Existing tags — Click a tag to apply it. Click an applied tag again to remove it. You can apply multiple tags to the same meeting or company.
Create new tag — Admins and managers can create a new tag without leaving the picker. Standard users won't see this option.
When you open a meeting, its tags appear as colored chips in the header — together with any tags applied to the companies associated with that meeting.

Combine tag filters with other filters (date range, users, meeting type, etc.) and save the result as a preset for reuse.
Tagging a company is a quick way to mark all of its meetings and emails at once — they'll show up via the company's tag chips on related meetings.
Keep your tag list lean. A handful of well-chosen tags is more useful than dozens of overlapping ones.